Ridgeback
This post is a quick and compact guide for working with the Clearpath Ridgeback.
Informative Links
-
Ridgeback ROS Cheat Sheet (Applicable to Noetic)
Ridgeback Description
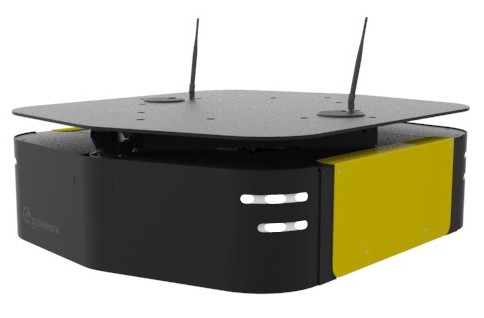
The Ridgeback is a versatile indoor robot platform of the Canadian manufacturer Clearpath Robotics. It is medium size, designed to effortlessly move heavy payloads and manipulators using an omni-drive. Its omnidirectional base enables precise positioning even in confined spaces, and it features an onboard computer, front Hokuyo laser scanners, optional rear Hokuyo laser scanners, and an IMU. The Ridgeback is fully integrated with ROS and Gazebo, and can be seamlessly connected with Clearpath’s diverse range of robot accessories.ROS Noetic is pre-installed, so after receiving the robot the user can start developing algorithms right away.
Quick Start
Powering On
The robot is turned on via the power button located on the right-rear end, and the start-up of the Ridgeback may take up to a minute to start. Once booted the Ridgeback displays flashing yellow lights on the rear left side of the robot, which means that the e-reset button located on the left-rear end of the robot needs to be pressed in order to complete the startup process of Ridgeback. Push the button once to complete the Ridgeback startup process. When the Ridgeback displays white lights in the front and red lights in the back, it means that the system has successfully started. The PS4 controller can be then used for movement.
Teleop
Some quick useful commands in case there is an issue with the joystick is to ssh into the robot and teleoperated it via:
rosrun teleop_twist_keyboard teleop_twist_keyboard.py
Network
This robot has a computer on board with the MCU port being on 192.168.131.2 and the main PC being on 192.168.131.1, the Hokuyo Lidar port being on 192.168.131.20/21.
| Device | Network | Password |
|---|---|---|
| Ridgeback | 192.168.131.1 | mybotshop |
| Ridgeback-MCU | 192.168.131.2 | |
| Hokuyo Lidar Front | 192.168.131.20 | |
| Hokuyo Lidar Rear | 192.168.131.21 |
Driver Configuration
Depending on the configuration of the Ridgeback, auxiliary sensors software drivers such as LiDar may start with the robot but often do not run as disconnection or damage of the wire of the sensor can cause the robot to startup incorrectly (In this case both Hokuyo Lidar drivers are turned on).
Robot Interface
For software remote connection, the robot has to be accessed once to configure the WiFi network. This network configuration can take place in one of two methods, the first being via the static network connection and the second being through the screen, where the screen method is much quicker and easier for clients to set up.
Static Network Connection
For the first time, one needs to connect through a LAN cable to configure the robot’s WLAN network.
To create a static connection in your own PC (not the Ridgeback), in Ubuntu go to Settings → Network then click on + and create a new connection.
-
The first task is to go to IPv4 and change the connection to manual.
-
The second task is to put the Address IP as 192.168.131.1 (may differ from robot to robot) and the Netmask as 24.
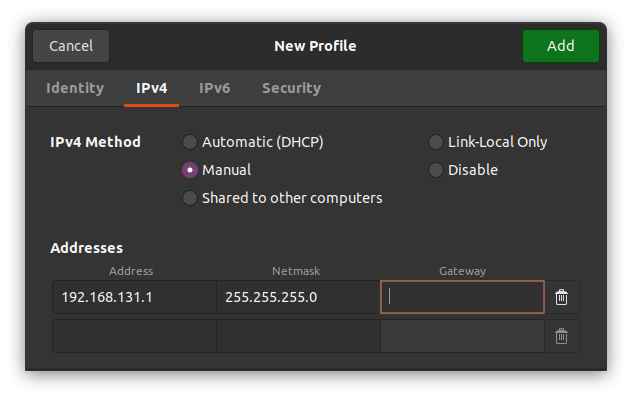
Click save and restart your network. Next is to connect the LAN cable to the robot. After a successful connection let’s check the host’s local IP by typing in the Host PC’s terminal.
ifconfig
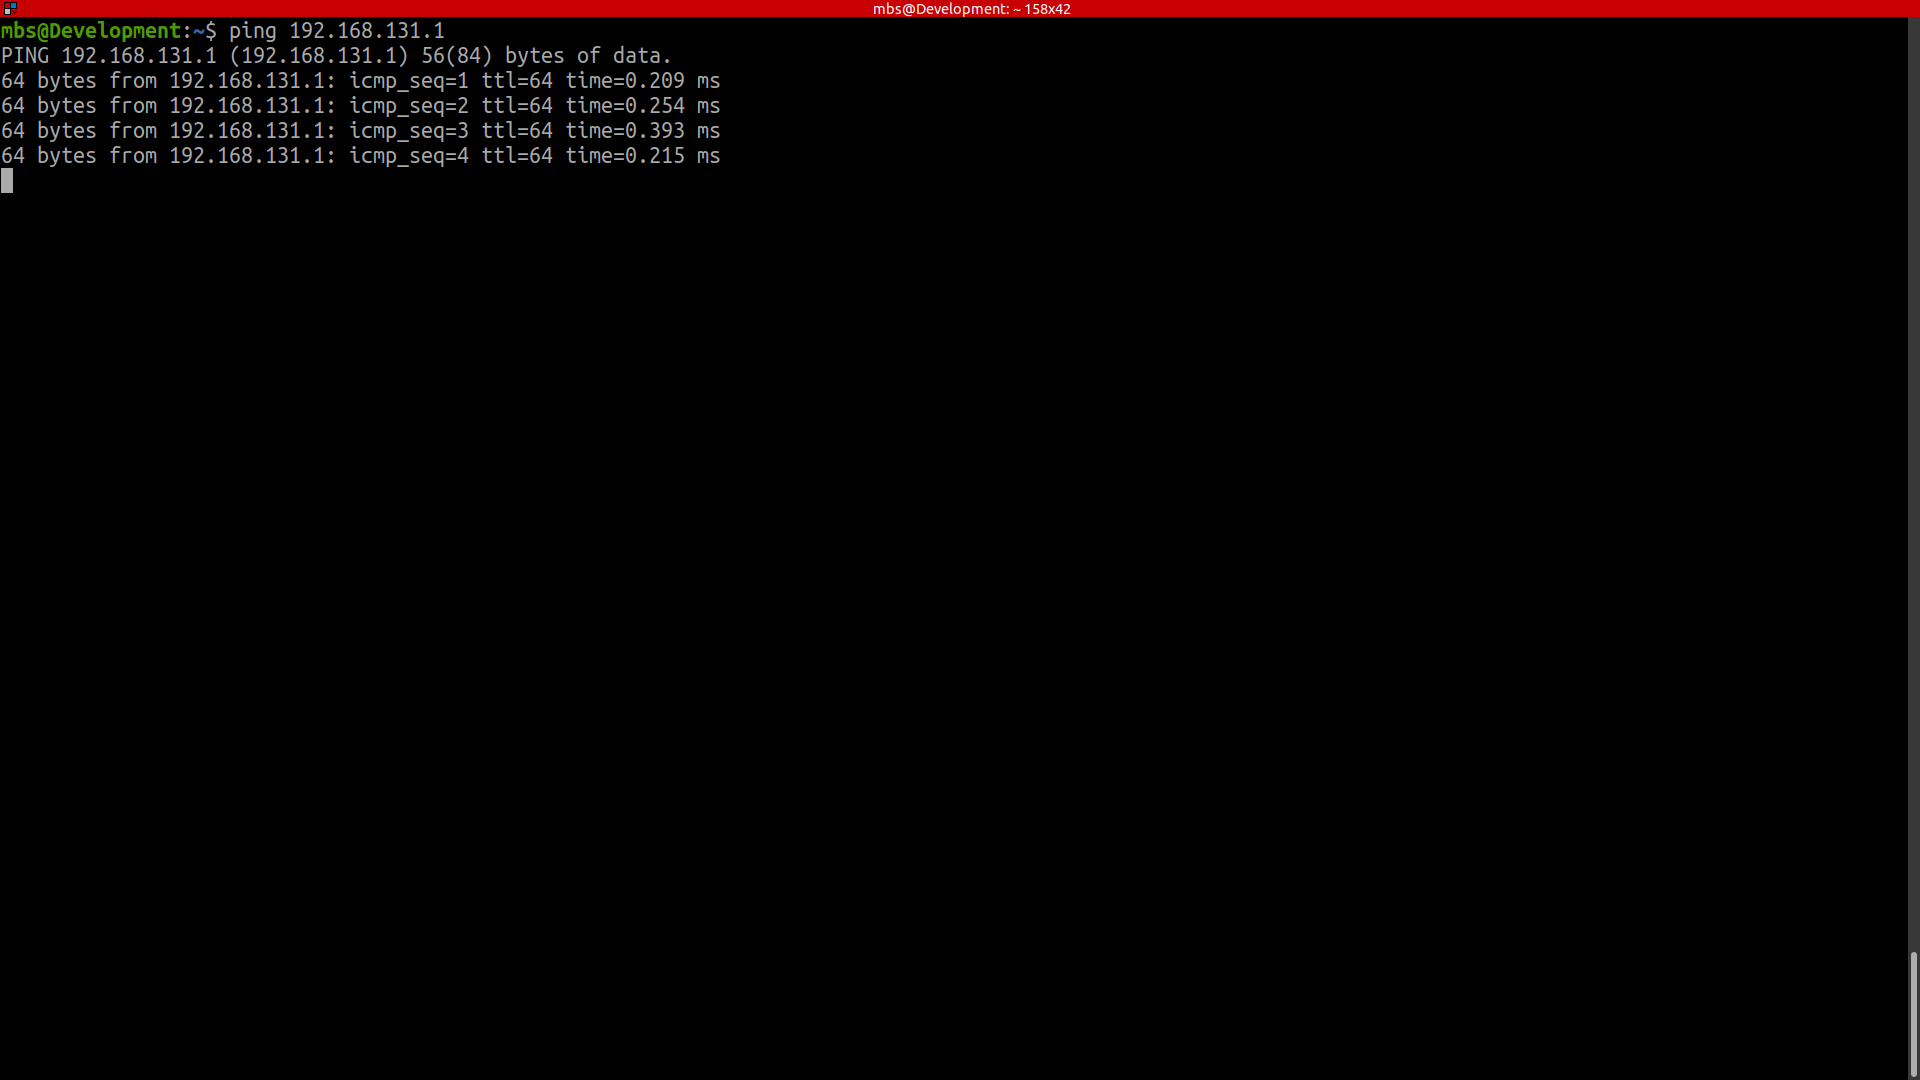
This should show the host IP which was assigned in the above step. Now its time to check if we can ping the robot or not, to do so type in your host pc
ping 192.168.131.1
After a successful ping, it’s time to access the robot. To access the robot you can type the following command:
ssh -X administrator@192.168.131.1
The password is
mybotshop
Screen Connection
An alternative for connecting to the Ridgeback is by plugging in an HDMI cable as well as a mouse and keyboard. This will allow you to connect the Ridgeback to your own local WiFi network and then you can connect later over the WiFi.
Ridgeback PC
The procedure is simply to go to your networks and add your WiFi. Then in the terminal type:
ifconfig
The IP that comes with the initial characters of wl is your WiFi’s IP. e.g. wlps0. With this IP you can SSH to your robot via your host PC.

ssh -X administrator@192.168.0.228
192.168.0.228 is just an example of this. IP is taken from the ifconfig.
mybotshop
Robot Software
The Ridgeback drivers configured by MYBOTSHOP are located in the ros_ws. In the src folder, the third_party contains the drivers for the Ridgeback and xARM6 as well as any auxiliary sensors such as the Hokuyo Lidars and Robotiq gripper. When connecting or ssh’ing to the robots pc, additional information regarding the robot will be displayed e.g.
-------------------------------------------------------------
     _  _  _  _  ____   __  ____  ____  _  _   __  ____
    ( \/ )( \/ )(  _ \ /  \(_  _)/ ___)/ )( \ /  \(  _ \
    / \/ \ )  /  ) _ ((  O ) )(  \___ \) __ ((  O )) __/
    \_)(_/(__/  (____/ \__/ (__) (____/\_)(_/ \__/(__)

-------------------------------------------------------------
Current PC: Ridgeback
-------------------------------------------------------------

RX IP:        192.168.131.1
Pswd:         mybotshop
SSH:          ssh -X administrator@192.168.131.1

Hokuyo F IP:  192.168.131.20  (INFO: Default on)

Hokuyo R IP:  192.168.131.21  (INFO: Default on)

-------------------------------------------------------------
RX-Startup
-------------------------------------------------------------

RX status:    sudo service rx status
RX start:     sudo service rx start
RX stop:      sudo service rx stop
RX restart:   sudo service rx restart

Update startup:  rosrun rx_startup startup_installer.py

-------------------------------------------------------------
RX-Drivers
-------------------------------------------------------------

View robot:      roslaunch rx_viz view_robot.launch
                 (INFO: Default off)
-------------------------------------------------------------
Robot Visualization
The robot can be visualized using rviz by running the following command
roslaunch rx_viz view_robot.launch
Similarly, the model can be visualized using rviz by running the following command
roslaunch rx_viz view_model.launch
Robot Description
We have added three components to the Ridgeback, one is the base plate which is attached to the top plate of the Ridgeback, a xARM6 that sits atop of the base plate, and finally, a gripper end-of-effector attached to the xARM6.
These components can be further investigated in the file named accessories.urdf.xacro which is located in the directory rx_description/xacro/accessories.urdf.xacro
Robot Startup
The Ridgeback ordinarily utilizes Clearpath startup job unless otherwise specified. In this robot, we have our own upstart job which has ros multi-machine setup on the ip 192.168.131.1. In case there is an issue with the robot not starting up. One can ssh into the Ridgeback and verify if the startup job is working correctly.
sudo service rx status
The red marker in the service indicates that the startup job has failed. Green indicates everything is working correctly. Grey indicates that the service has not started yet. In case of red or grey marker, you may restart the service via:
sudo service rx restart
If you want to modify the upstart job or add other ROS launch files to it then it is recommended to add your changes to the main upstart file i.e. rx_system.lunch located in the rx_startup package. Once done, save the file and run the following command to update the startup job.
rosrun rx_startup startup_installer.py
Additionally, the setup.bash in rx_startup/config file consists of environment variables of the robot and sensors that can be used to enable and disable certain features. Robot Variables for different accessories are named as follow:
| Device | Variable Name |
|---|---|
| Hokuyo Lidar Front | RIDGEBACK_FRONT_HOKUYO_LASER |
| Hokuyo Lidar Rear | RIDGEBACK_REAR_HOKUYO_LASER |
Auxiliary Components
Hokuyo Lidar
The Lidar drivers are started via:
roslaunch rx_lidars lidars.launch
Note: The driver is by default ON